
Let me tell you about the first time I made an Apple Cider Brined Turkey. It was a chilly November day, and I was determined to impress my family at our Thanksgiving feast. I had heard whispers of how apple cider could transform a turkey into a juicy, flavorful centerpiece, and trust me when I say, it was a game-changer! After making it a couple of times, I can confidently say that it’s become a beloved tradition in my household. The aroma alone is enough to get everyone excited, and the taste? Absolutely divine. If you’re looking to elevate your Thanksgiving dinner this year, keep reading because this recipe is going to wow your guests!
Why You’ll Love This Apple Cider Brined Turkey
- Incredible Flavor: The apple cider brine infuses your turkey with a sweet, tangy flavor that is simply irresistible.
- Juicy and Tender: The brining process ensures that your turkey is moist and succulent, making every bite a delight.
- Visual Appeal: A beautifully roasted turkey is the star of the table, and this recipe delivers a stunning golden-brown finish.
- Easy to Make: With just a few simple steps, you can create a show-stopping dish without the stress.
- Make-Ahead Convenience: Prepare the brine in advance, allowing you to enjoy more time with your loved ones on the big day.
- Versatile Recipe: This brining technique can be adapted for different flavors, making it a recipe you’ll want to revisit throughout the year!
The Secret to Perfect Apple Cider Brined Turkey
The secret to a perfect Apple Cider Brined Turkey lies in the balance of flavors and the time you allow your turkey to soak in the brine. The apple cider provides sweetness, while the salt and spices enhance the natural flavors of the turkey. Here’s an insider tip: use fresh herbs and spices in your brine for an extra punch of flavor. Trust me, this makes all the difference! The longer you brine (up to 24 hours), the more flavor you’ll infuse. It’s really a simple process, and anyone can do it. Just follow the steps, and you’ll be on your way to turkey perfection!
Rave Reviews from Friends and Followers
“This apple cider brined turkey was the highlight of our Thanksgiving! Everyone couldn’t stop raving about how juicy it was!” – Sarah J.
“I’ve never made a turkey before, and this recipe made it so easy! It turned out better than I could have imagined.” – Mike T.
“I made this for a family gathering, and it was a total crowd-pleaser. I’ll never go back to plain turkey again!” – Emily R.
Creative Variations to Try
- Herb-Infused Brine: Add rosemary, thyme, and sage to the brine for an herbal twist.
- Citrus Zest: Incorporate orange or lemon zest for a bright, refreshing flavor.
- Spicy Kick: Add some crushed red pepper flakes for a hint of heat.
- Maple Syrup Glaze: Brush the turkey with a maple syrup glaze during the last hour of roasting for a sweet, caramelized finish.
Bonus: Try adding a splash of bourbon to your brine for a sophisticated depth of flavor.
FAQs – All Your Questions Answered!
How long should I brine my turkey? A minimum of 12 hours is recommended, but up to 24 hours will yield even better results.
Can I use a frozen turkey? Yes, just make sure to fully thaw it before brining, as the brine needs to penetrate the meat.
What if I don’t have apple cider? You can substitute apple juice, but the flavor won’t be quite as rich.
How do I store leftovers? Store leftover turkey in an airtight container in the refrigerator for up to 4 days.
Can I freeze the brined turkey? Yes, but make sure to cook it first and then freeze the leftovers.
Storage/Serving Tips
- Store leftover turkey in the fridge in an airtight container for up to 4 days.
- If you want to keep it longer, slice and freeze the turkey for up to 3 months.
- Reheat slices in the oven covered with foil to retain moisture.
- Serve with homemade gravy or cranberry sauce for a delightful pairing.
Perfect Occasions for Apple Cider Brined Turkey
- Thanksgiving Dinner
- Christmas Feast
- Family Reunions
- Friendsgiving Gatherings
- Special Celebrations
- Autumn Dinner Parties
The Complete Recipe
Thank you for joining me on this flavorful journey! Now, let’s get into the nitty-gritty of making the most delicious Apple Cider Brined Turkey you’ll ever taste!
Apple Cider Brined Turkey
Ingredients
- 1 whole turkey (12-14 pounds)
- 1 gallon apple cider
- 1 cup kosher salt
- 1/2 cup brown sugar
- 1 tablespoon black peppercorns
- 4-5 cloves garlic, smashed
- 2-3 sprigs fresh thyme
- 2-3 sprigs fresh rosemary
- 1 tablespoon allspice berries
- Water, as needed
Tip: You can add other spices like cloves or nutmeg to customize the flavor!
Extend ingredients section: Optional add-ins like sliced apples or oranges can enhance the brine’s flavor and make it even more aromatic. Each ingredient plays a role in adding depth and richness to your turkey, so don’t skip any of them!
Step-by-Step Instructions
Step 1: Prepare the Brine
In a large pot, combine the apple cider, kosher salt, brown sugar, black peppercorns, garlic, thyme, rosemary, and allspice. Bring this mixture to a boil, stirring until the salt and sugar dissolve completely. Once boiling, remove from heat and let it cool. This brine is where all the magic begins!
Step 2: Brine the Turkey
Once your brine has cooled completely, you can prepare your turkey. Make sure to remove the innards and rinse the turkey under cold water. Then, in a large container (or a clean cooler!), combine the brine with enough cold water to fully submerge the turkey. Place the turkey in the brine, cover, and refrigerate for 12-24 hours. This is where that flavor truly develops!
Step 3: Rinse and Dry
After the brining time is up, remove the turkey from the brine and rinse it under cold water to remove excess salt. Pat it dry with paper towels. This step is crucial for achieving that crispy skin we all love!
Step 4: Roast the Turkey
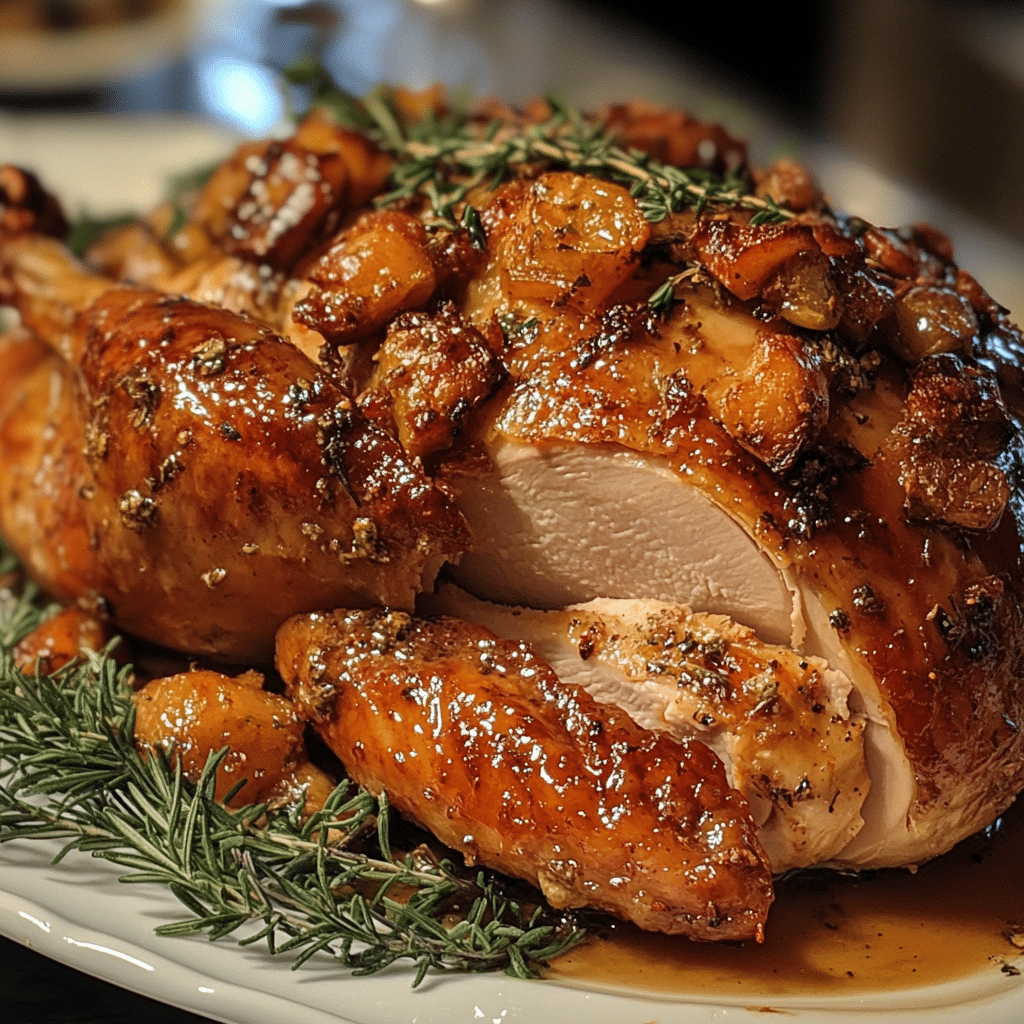
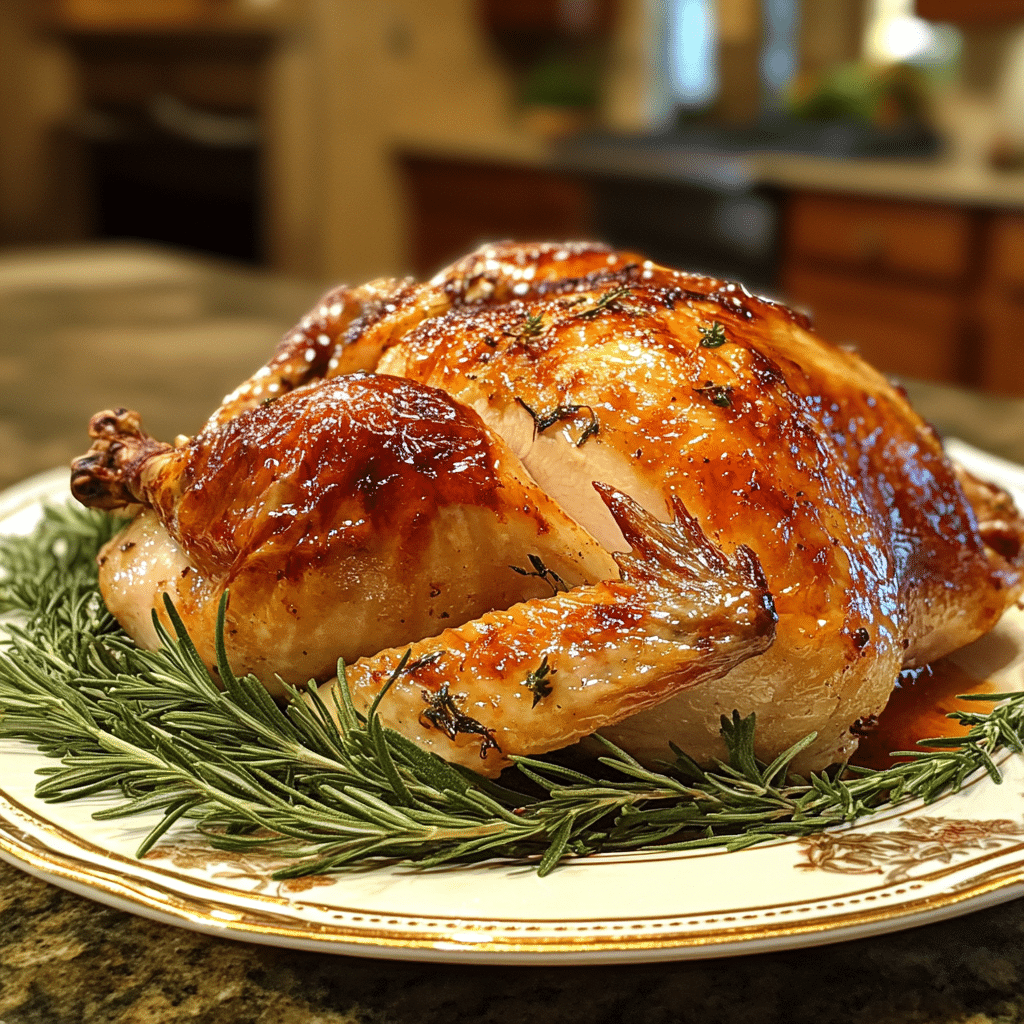
Preheat your oven to 325°F (165°C). Place the turkey on a roasting rack in a large roasting pan. Roast the turkey for approximately 13-15 minutes per pound, or until the internal temperature reaches 165°F (75°C). Baste with pan juices every 30 minutes for a beautifully golden skin. The aroma will fill your kitchen and have everyone eagerly awaiting dinner!
Step 5: Rest and Serve
Once your turkey is done, let it rest for at least 30 minutes before carving. This helps the juices redistribute, ensuring each slice is as juicy as can be. Serve your turkey with your favorite sides, and watch as your guests rave about your culinary skills!
Nutrition info: This turkey recipe is not only delicious but also packed with protein,
Related Recipes You’ll Love :


