
Let me tell you, there’s nothing like the excitement of putting together a Thanksgiving charcuterie board! I can’t count how many times I’ve made this stunning centerpiece for family gatherings and friends’ get-togethers. It never fails to impress! The combination of flavors and the visual appeal is a total game-changer. If you’re looking to wow your guests this Thanksgiving, you’re in the right place. Get ready to elevate your holiday table with a charcuterie board that will have everyone talking long after the last bite!
Why You’ll Love This Thanksgiving Charcuterie Board
- Ease of Assembly: Honestly, you don’t have to be a culinary expert to put this together. Just layer, arrange, and voilà!
- Versatility: You can customize it based on your guests’ preferences. Whether they love sweet, savory, or a little bit of both, you can create the perfect mix.
- Stunning Visual Appeal: It’s a feast for the eyes! The colors and textures of the ingredients create a beautiful display that’ll have everyone reaching for their phones to snap a picture.
- Make-Ahead Convenience: You can prep much of it in advance. Trust me, this makes your Thanksgiving day so much smoother!
- Great for Sharing: A charcuterie board encourages mingling. It’s perfect for guests to gather around and enjoy together.
- Endless Flavor Combinations: With seasonal fruits, gourmet cheeses, and savory meats, the flavor possibilities are endless!
The Secret to Perfect Thanksgiving Charcuterie Board
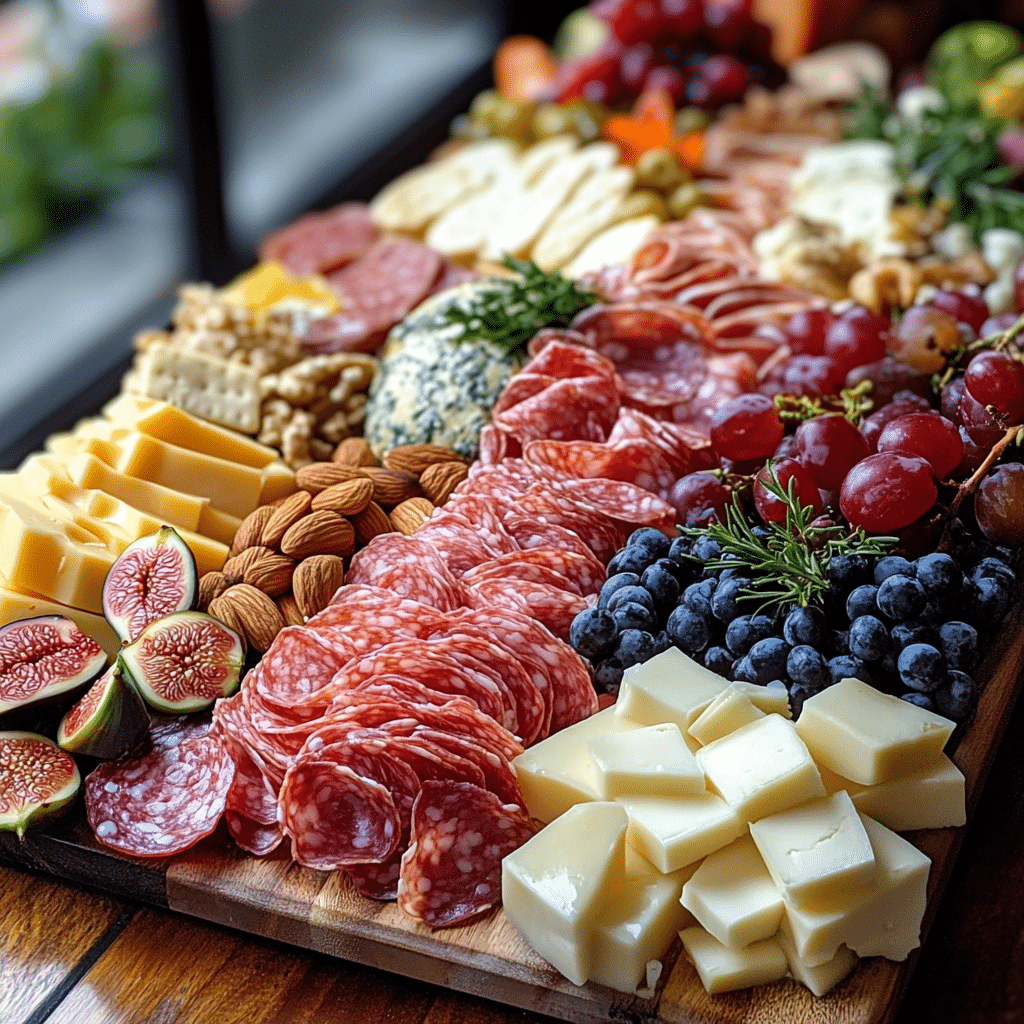
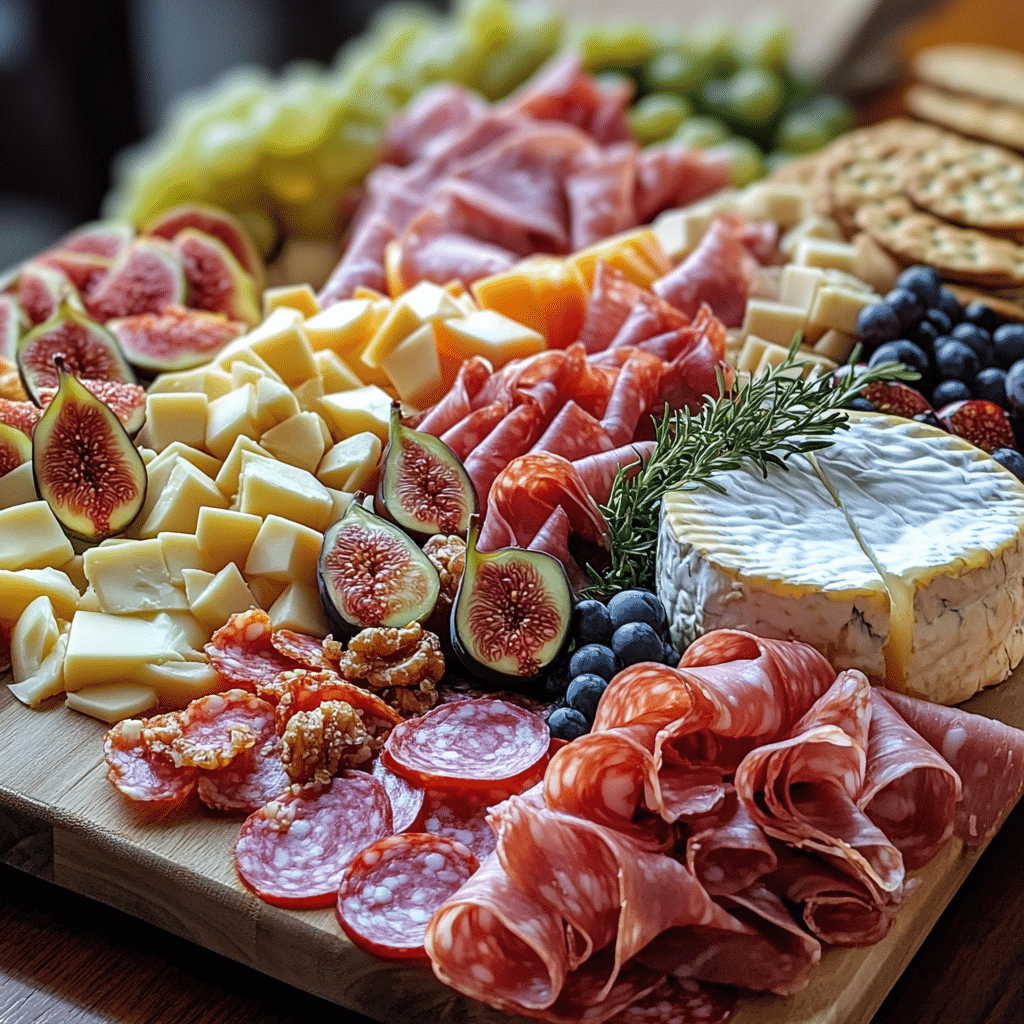
The key to a perfect Thanksgiving charcuterie board is all in the balance. You want a variety of flavors and textures that complement each other. I always start with a selection of cheeses — a creamy brie, a sharp cheddar, and maybe a blue cheese for some bite. Then, I layer in some cured meats, like prosciutto and salami, which add a savory depth. Trust me, the contrast between the creamy cheeses, salty meats, and sweet seasonal fruits is what makes this board truly special.
Insider tip: Don’t be afraid to get creative! Adding a drizzle of honey or a sprinkle of nuts can take your board to the next level. Remember, the presentation matters too! Arrange everything artfully, and don’t be afraid to let things overlap. It adds to the rustic charm that everyone loves.
Rave Reviews from Friends and Followers
“This Thanksgiving charcuterie board was the highlight of our dinner! Everyone was raving about it, and I felt like a total rockstar!” – Sarah M.
“I tried this for the first time at a friend’s house, and I knew I had to make my own! It was so fun to put together and looked absolutely gorgeous!” – Tyler K.
“I never knew a charcuterie board could be so easy and delicious! This is a must-have for all my gatherings from now on!” – Jenna P.
Creative Variations to Try
- Fall Harvest Board: Incorporate seasonal ingredients like roasted butternut squash, cranberries, and spiced nuts.
- Sweet & Savory: Mix in dark chocolate, dried apricots, or honeycomb for a delightful contrast.
- International Flair: Feature cheeses and meats from around the world, like Spanish chorizo or French camembert.
- Veggie Lover’s Delight: Focus on a plant-based board with hummus, olives, and an array of colorful vegetables.
- Bonus Tip: Use themed serving ware! A rustic wooden board or festive platter can elevate your presentation even more.
FAQs – All Your Questions Answered!
How far in advance can I prepare my charcuterie board?
You can prepare components like cheeses, meats, and fruits a day in advance. Just wait to assemble it until a few hours before serving to keep everything fresh and vibrant.
What if I have dietary restrictions to consider?
No problem at all! Just swap out any ingredients that don’t work for your guests. For instance, use vegan cheeses or gluten-free crackers if needed.
Can I store leftovers?
Yes! Store any leftovers in an airtight container in the fridge for up to three days. Just keep in mind that some ingredients, like fruits, may lose their texture over time.
How do I keep my fruits from browning?
A little lemon juice can do wonders! Lightly coat your cut fruits to keep them looking fresh and vibrant.
What type of board should I use?
A wooden cutting board or a large platter works beautifully. Make sure it’s large enough to hold all your delicious ingredients!
Storage/Serving Tips
- Keep ingredients separate until you’re ready to serve for maximum freshness.
- Cover with plastic wrap if you need to store it before serving — just be gentle with delicate items like cheese.
- For optimal flavor, let your cheeses come to room temperature before serving, about 30 minutes beforehand.
Perfect Occasions for Thanksgiving Charcuterie Board
- Thanksgiving dinner with family and friends
- Holiday parties and gatherings
- Game day celebrations
- Casual get-togethers or wine evenings
- Brunch with friends or family
- Winter holidays and festive events
The Complete Recipe
Thanks for sticking with me! Now, let’s dive into creating your own Thanksgiving charcuterie board.
Thanksgiving Charcuterie Board
Ingredients
- 1 wheel of brie cheese
- 1 block of sharp cheddar cheese
- 4 ounces of blue cheese
- 4 ounces of prosciutto
- 4 ounces of salami
- 1 cup of seasonal fruits (like figs, apples, or grapes)
- 1 cup of mixed nuts (almonds, walnuts, or pecans)
- 1 jar of honey or fig jam
- Assorted crackers or breadsticks
Tip: Feel free to mix and match! Use whatever cheeses and meats you love, and don’t forget to include a mix of textures — hard, soft, creamy, and crunchy.
Step-by-Step Instructions
Step 1: Gather Your Ingredients
Start by collecting all your ingredients. I like to lay everything out on my kitchen counter so I can see what I have. This makes assembling the board much easier and helps with the artful arrangement.
Step 2: Choose Your Board
Select a large wooden cutting board, slate, or decorative platter. A bigger board gives you more space to create a visually appealing layout. Make sure it’s clean and dry before you start arranging!
Step 3: Arrange the Cheeses
Place the cheese first as the foundation of your board. Cut some slices of cheddar for easy serving, and leave the brie whole for an elegant touch. Position them at opposite ends of the board to create balance.
Step 4: Add the Meats
Next, layer your cured meats. I like to fold the prosciutto and salami into little fans or rolls to create height and interest. This is where the visual appeal really starts to come together!
Step 5: Fill in with Fruits and Nuts
Scatter your seasonal fruits around the cheeses and meats. I love using vibrant apples and juicy grapes. Add in the nuts in small clusters — they not only add flavor but also texture.
Step 6: Don’t Forget the Extras
Include a small bowl of honey or jam as a sweet contrast to the savory flavors. And don’t forget those delightful crackers or breadsticks! Arrange them in a way that guests can easily grab without messing up the display.
Step 7: Final Touches
Related Recipes You’ll Love :


