
If you’re looking for a show-stopping dessert that will leave your Halloween guests both amazed and a little creeped out, then you’ve got to try making a Bloody Brain Cake! I’ve whipped this up for my Halloween parties so many times, and it’s always a huge hit. Trust me, it’s not just the spooky appearance that gets everyone talking; the taste is absolutely delicious! This cake has become a staple in my spooky celebrations, and I can’t wait to share the recipe with you.
Why You’ll Love This Bloody Brain Cake
- Visually Stunning: The realistic brain design is sure to impress and start conversations.
- Delicious Flavor: The moist cake paired with creamy frosting is a delightful treat for any sweet tooth.
- Easy to Make: This recipe is straightforward and can be done even by novice bakers.
- Make-Ahead Friendly: You can prepare the cake in advance, making party planning a breeze.
- Versatile: You can easily customize flavors and colors to suit your party theme!
The Secret to Perfect Bloody Brain Cake
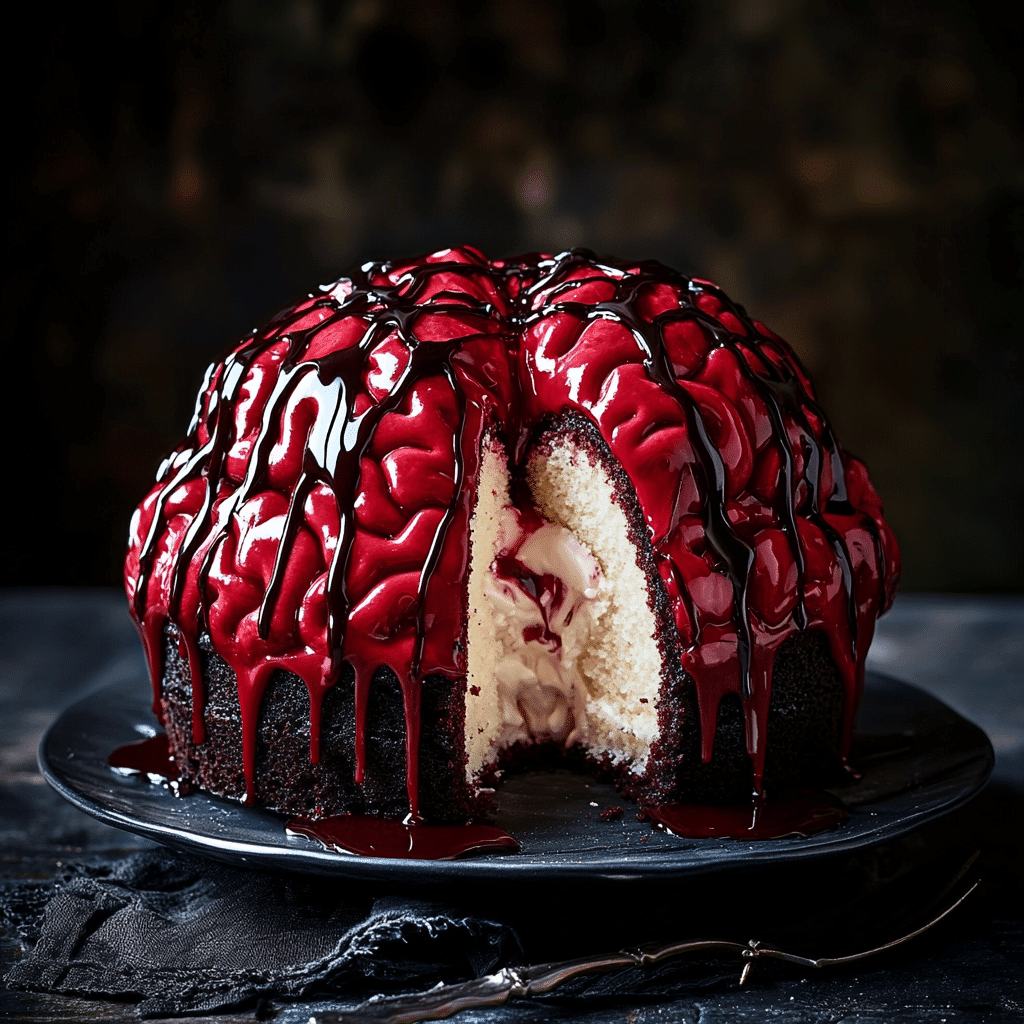
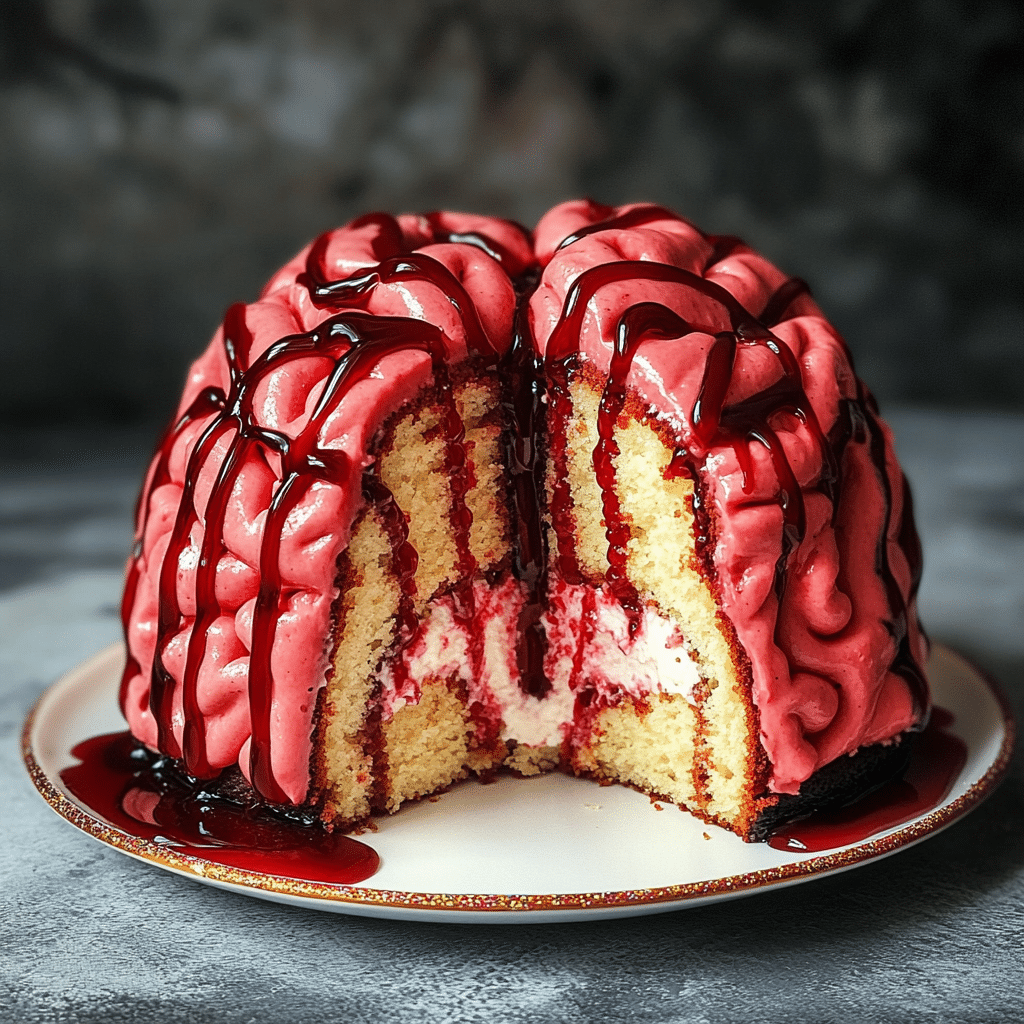
The secret to achieving that realistic brain look lies in how you shape and frost the cake. I use a simple bundt cake mold and a piping bag for the frosting to create those intricate details. The key is to be a little creative and patient while frosting—trust me, it’s worth it! To make it easier, I recommend chilling the cake slightly before frosting; it helps the frosting set better and gives you a smoother finish. Anyone can master this technique, and it’s a game-changer for your cake’s appearance!
Rave Reviews from Friends and Followers
“I brought the Bloody Brain Cake to our Halloween party, and it was the star of the night! Everyone was blown away by how realistic it looked and how delicious it tasted. I can’t wait to make it again!” — Sarah M.
“This cake is a total showstopper! I made it for my kids’ Halloween bash, and they couldn’t stop talking about it. The flavors were spot on!” — Jake T.
“My friends thought I was a baking genius when I served this Bloody Brain Cake. It was so easy to make, and they loved the spooky theme!” — Emily R.
Creative Variations to Try
- Red Velvet Cake: Use red velvet instead of vanilla for a deeper color and flavor.
- Chocolate Cake: A rich chocolate cake can add a twist to the traditional recipe.
- Vanilla Buttercream: Swap the frosting for vanilla buttercream for a classic twist.
- Fruit Fillings: Add a raspberry or cherry filling for a fruity surprise.
- Bonus: Use edible glitter or decorations to create a “bloody” drizzle effect on top for added flair.
FAQs – All Your Questions Answered!
Can I make this cake ahead of time?
Absolutely! You can bake the cake a day or two in advance. Just wrap it tightly in plastic wrap and store it in the fridge until you’re ready to frost and serve.
What if I don’t have a bundt pan?
No problem! You can use two round cake pans. Just stack them and carve the cake to create the brain shape.
Can I substitute any ingredients?
Yes! You can substitute the cake mix for a homemade version, and for the frosting, cream cheese frosting works great too!
How long will the cake last?
The cake can be stored in the fridge for up to five days, but trust me, it won’t last that long!
What can I do if my frosting is too runny?
If your frosting is too runny, try chilling it for a bit or adding more powdered sugar until it reaches your desired consistency.
Storage/Serving Tips
- Store the cake in an airtight container in the fridge for up to five days.
- For longer shelf life, freeze it! Just wrap it tightly in plastic wrap and then foil.
- Serve with a side of fresh berries or a drizzle of chocolate sauce for an extra treat.
Perfect Occasions for Bloody Brain Cake
- Halloween Parties
- Spooky Movie Nights
- Costume Contests
- School Halloween Events
- Fall Festivals
- Haunted House Gatherings
- Birthday Parties with a spooky theme
The Complete Recipe
Now that you’re fully equipped with all the tips and tricks, let’s dive into the actual recipe. I hope you enjoy making this as much as I do!
Bloody Brain Cake
Ingredients
- 1 box of vanilla cake mix
- 3 large eggs
- 1 cup of water
- 1/2 cup of vegetable oil
- 2 cups of red frosting (store-bought or homemade)
- Black food coloring (optional)
- Fresh raspberries or cherries for garnish (optional)
Tip: For the best flavor, use high-quality cake mix and frosting.
Extend ingredients section: If you want to make this cake even more special, consider adding a layer of raspberry jam between the cake layers for a fruity surprise. You can also substitute half of the water with buttermilk for a richer taste.
Step-by-Step Instructions
Step 1: Preheat and Prepare
Preheat your oven to 350°F (175°C) and grease your bundt pan thoroughly. This will help the cake slide out without any hassle later on!
Step 2: Mix the Batter
In a large mixing bowl, combine the cake mix, eggs, water, and vegetable oil. Mix until smooth, about 2 minutes. You want to ensure there are no lumps, so take your time here.
Step 3: Bake the Cake
Pour the batter into your prepared bundt pan and bake for 30-35 minutes, or until a toothpick inserted into the center comes out clean. The aroma of the baking cake will fill your kitchen, making it hard to resist tasting!
Step 4: Cool the Cake
Once baked, let the cake cool in the pan for about 10 minutes before inverting it onto a wire rack. Allow it to cool completely, which is crucial for a flawless frosting application.
Step 5: Frosting the Cake
Once the cake is cool, it’s time to frost! Use a piping bag to create the brain-like texture with the red frosting. If you want to get creative, add a few drops of black food coloring for a darker, bloodier look.
Step 6: Decorate and Serve
Garnish with fresh raspberries or cherries if desired. The final touch will make your cake look even more realistic. Slice and serve it to your guests, and watch their reactions!
Nutrition info: This cake serves about 12 people, with approximately 350 calories per slice (depending on portion size and frosting).
Final Thoughts
Making this Bloody Brain Cake is not just about baking; it’s about creating a memorable experience for you and your loved ones. The combination of its stunning appearance and delicious flavor makes it a must-try for any Halloween celebration. I encourage you to give it a shot! Trust me, you’ll love seeing the looks of delight on your guests’ faces as they dig into this spooky treat. Happy baking!
Related Recipes You’ll Love :


