
Friends, let me tell you about one of my absolute favorite things to whip up for Halloween—the Halloween Cheeseboard! I’ve made this delightful spread more times than I can count, and each time it’s a game-changer. Imagine a stunning arrangement of cheeses, colorful fruits, and spooky treats that not only tastes incredible but also looks like a total masterpiece. Trust me, this cheeseboard is the ultimate centerpiece for your cozy Halloween celebrations, and I can’t wait to share how to create it with you!
Why You’ll Love This Halloween Cheeseboard
- Easy to Assemble: No cooking required! Just arrange and serve.
- Visually Stunning: The vibrant colors and spooky elements make it a feast for the eyes.
- Versatile: Customize with your favorite cheeses, fruits, and treats.
- Perfect for Sharing: Great for parties or family gatherings, everyone can dig in!
- Make-Ahead Convenience: Assemble it in advance and chill until ready to serve.
The Secret to Perfect Halloween Cheeseboard
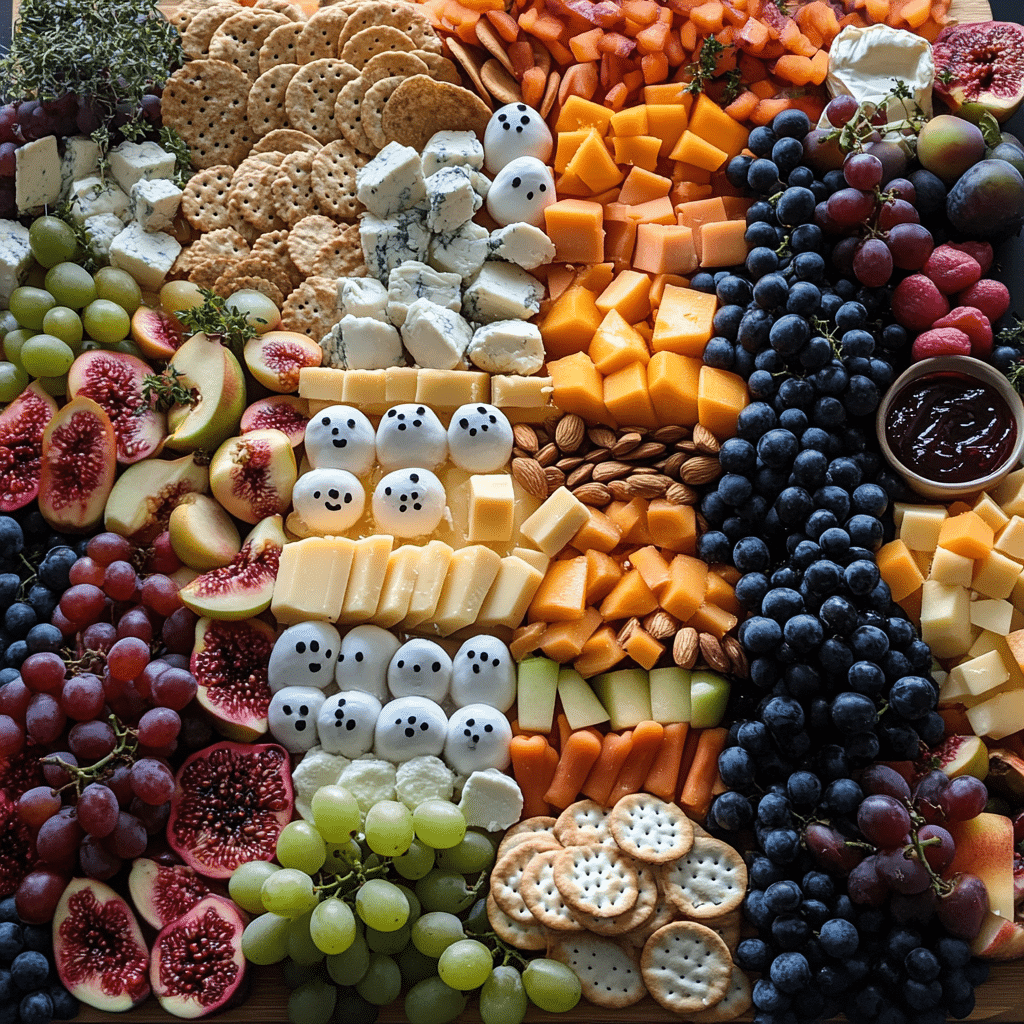
The secret to creating the perfect Halloween cheeseboard lies in the balance of flavors and textures. You want a mix of creamy cheeses, crunchy crackers, and sweet fruits. I always start with a variety of cheeses like sharp cheddar, creamy brie, and tangy goat cheese. The key is to let them come to room temperature before serving—this enhances their flavor and makes them delightful to eat. Also, don’t forget to incorporate some fun, spooky elements—think ghost-shaped cheese or spiderwebs made of string cheese! These little touches make all the difference and will wow your guests.
Rave Reviews from Friends and Followers
“This Halloween cheeseboard was the hit of our party! Everyone couldn’t stop raving about it.” – Sarah M.
“I never knew a cheeseboard could be so fun and festive! I’m definitely making this every year.” – Jake T.
“The flavors were incredible, and the presentation was just perfect. Thank you for sharing this!” – Emily R.
Creative Variations to Try
- Sweet & Savory: Incorporate honey, fig jam, or dark chocolate for a sweet contrast.
- Spooky Shapes: Use cookie cutters to shape cheeses and fruits into Halloween-themed designs.
- Charcuterie Twist: Add an assortment of cured meats for a heartier board.
- Seasonal Fruits: Use fall favorites like pomegranates, pears, and apples for a seasonal touch.
Bonus: Consider adding a touch of edible glitter for that extra sparkle—your guests will be enchanted!
FAQs – All Your Questions Answered!
How long can I leave the cheeseboard out? You can leave it out for about 2 hours, but if it’s a warm day, aim for 1 hour to keep it safe to eat.
Can I make it ahead of time? Absolutely! You can prepare the cheeseboard a few hours in advance. Just cover it with plastic wrap and keep it in the fridge.
What if I have leftovers? Store any leftover cheese in an airtight container in the fridge for up to a week. Fruits should be consumed within a day or two.
Can I substitute ingredients? Yes! Feel free to swap any cheeses or fruits based on your personal preferences or dietary restrictions.
Storage/Serving Tips
- Store leftover cheese in the refrigerator in an airtight container.
- Fresh fruits should be consumed quickly for the best quality.
- Consider serving on a wooden board or slate for a rustic look.
Perfect Occasions for Halloween Cheeseboard
- Halloween parties with friends and family
- Cozy movie nights featuring classic horror films
- Fall gatherings and harvest celebrations
- Kids’ Halloween parties—great for little hands!
- Office potlucks or team-building events
The Complete Recipe
Thank you for sticking with me through all the excitement! Now, let’s get into the nitty-gritty of assembling your own Halloween Cheeseboard.
Halloween Cheeseboard

Ingredients
- 1 cup sharp cheddar cheese, cubed
- 1 cup brie cheese, sliced
- 1 cup goat cheese, crumbled
- 1 cup assortment of crackers (your choice!)
- 1 cup seasonal fruits (grapes, pomegranates, sliced apples)
- 1/2 cup nuts (almonds, walnuts, or pumpkin seeds)
- 1/4 cup honey or fig jam
- Edible decorations (like Halloween-themed cookie cutters or sprinkles)
Tip: Choose a mix of cheeses for a variety of textures and flavors. Mild cheeses can balance out stronger flavors, and colorful fruits will add a pop of color!
Step-by-Step Instructions
Step 1: Gather Your Ingredients
Start by gathering all your ingredients on a clean surface. Make sure you have a large board or platter ready to create your cheeseboard masterpiece. The excitement begins as you see all the vibrant colors laid out before you!
Step 2: Arrange the Cheeses
Begin by placing your cheeses on the board. I like to create a triangle shape with the cheeses, starting with the largest piece in the center (like the brie). This arrangement allows for easy access and a visually appealing layout. Don’t worry about perfection—embrace the beautiful chaos!
Step 3: Fill in with Crackers
Next, it’s time to fill the gaps with crackers. I like to mix different types, so you have a variety of flavors and textures. Place them around the cheeses, ensuring that they are easily accessible for dipping and spreading. This is where the fun begins, and your guests will appreciate the variety!
Step 4: Add Fruits and Nuts
Now, let’s bring in the fruits! Scatter your seasonal fruits around the board. Grapes and pomegranates are not just delicious; they also add a pop of color! Sprinkle the nuts in between to fill any empty spaces and add that satisfying crunch. The visual appeal will be off the charts!
Step 5: Finish with Sweet Touches
Drizzle honey or dollop fig jam in small bowls on the board or directly onto the cheeses. This sweet element will complement the savory flavors beautifully. If you’re feeling crafty, use the cookie cutters to create spooky shapes out of cheese or fruits and place them on the board. Your Halloween Cheeseboard is now ready to impress!
And there you have it, a Halloween Cheeseboard that’s not just a treat for the tummy but also a feast for the eyes! Each bite offers a delightful combination of flavors that will leave your guests raving. Nutritionally, this cheeseboard offers a mix of proteins and healthy fats, especially if you include nuts and fruits, making it an indulgent yet balanced option for your festivities.
Final Thoughts
I truly believe that this Halloween Cheeseboard will become a staple in your holiday celebrations, just like it has for me. The joy of creating something that not only looks stunning but also tastes incredible is unmatched. I encourage you to try it out and put your own spin on it. Gather your favorite ingredients, get creative, and let the Halloween spirit shine through your delicious creation! Happy cheeseboarding!
Related Recipes You’ll Love :


