
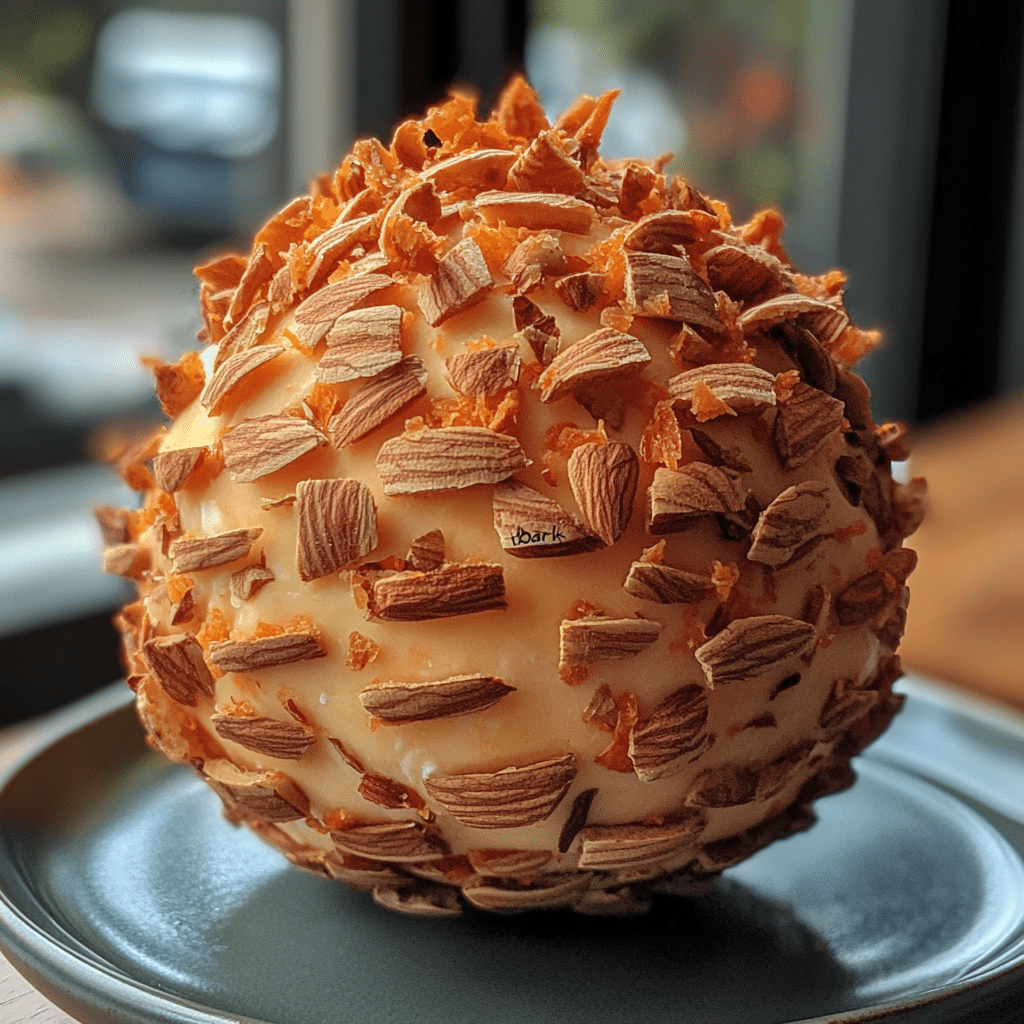
I still remember the first time I made my Pine Cone Cheese Ball. It was for a cozy gathering at my place, and I was a bit nervous about serving something new. Little did I know, this stunning appetizer would steal the show! I’ve made this delightful cheese ball countless times since then, and every single time it has received rave reviews. Trust me, it’s a game-changer that’s guaranteed to impress your guests and spark joy at your table!
Why You’ll Love This Pine Cone Cheese Ball
- Visually Stunning: The pine cone shape is not just eye-catching; it adds a touch of whimsy to your appetizer table.
- Easy to Make: With just a handful of ingredients, you can whip this up in no time!
- Versatile Flavor: You can customize it with your favorite cheeses and nuts to suit your palate.
- Perfect Make-Ahead Appetizer: Prepare it the day before and let it chill in the fridge for easy serving.
- Guaranteed Crowd-Pleaser: Everyone loves cheese, and this dish will have your guests coming back for seconds!
The Secret to Perfect Pine Cone Cheese Ball
The secret to a perfect Pine Cone Cheese Ball lies in using the right combination of creamy cheeses and crunchy nuts. I like to use a mix of cream cheese and sharp cheddar for the perfect balance of flavor and texture. A tip I’ve learned over time is to let your cream cheese soften at room temperature before mixing. This ensures a smooth consistency that makes shaping the cheese ball a breeze! Don’t worry; if you’ve never made a cheese ball before, you’ve got this!
Rave Reviews from Friends and Followers
“This Pine Cone Cheese Ball was the highlight of our holiday party! Everyone was raving about it!” – Sarah J.
“I made this for a potluck, and it was gone in minutes! Such a fun and delicious appetizer!” – Mark R.
“I can’t believe how easy this was to make! It looked so fancy, and my guests loved it!” – Emily T.
Creative Variations to Try
- Herb and Garlic: Mix in fresh herbs like chives, parsley, or dill for an aromatic twist.
- Spicy Jalapeño: Add finely chopped jalapeños for a kick of heat!
- Smoky Bacon: Incorporate crispy bacon bits for a savory crunch.
- Sweet Cranberry: Fold in dried cranberries for a sweet and tangy surprise.
Bonus: Experiment with different nuts for rolling the cheese ball. Pecans, walnuts, or even pistachios can add unique flavors!
FAQs – All Your Questions Answered!
Can I make this ahead of time?
Absolutely! You can prepare the cheese ball a day in advance. Just wrap it tightly in plastic wrap and refrigerate until ready to serve.
What can I substitute for cream cheese?
If you’re looking for a lighter option, consider using Greek yogurt or a dairy-free cream cheese alternative.
How long will it last in the fridge?
Your Pine Cone Cheese Ball will be good for about 3-5 days in the fridge, provided it’s stored properly in an airtight container.
Can I freeze it?
While it’s technically possible to freeze, I recommend enjoying it fresh for the best texture and flavor. If you do freeze it, let it thaw in the fridge before serving.
Storage/Serving Tips
- Store your cheese ball in an airtight container in the fridge to maintain freshness.
- For serving, let it sit at room temperature for about 30 minutes before your guests arrive for the best flavor.
- Pair it with an assortment of crackers, sliced veggies, or toasted bread for a delightful presentation.
Perfect Occasions for Pine Cone Cheese Ball
- Holiday parties and family gatherings
- Potluck dinners with friends
- Game day celebrations
- Brunches and cocktail parties
- Outdoor picnics and barbecues
- Festive events like Thanksgiving and Christmas
The Complete Recipe
Thank you for sticking with me! I can’t wait for you to try this amazing recipe. Here’s how to make your own Pine Cone Cheese Ball:
Pine Cone Cheese Ball
Ingredients
- 2 (8 oz) packages of cream cheese, softened
- 1 cup shredded sharp cheddar cheese
- 1/2 cup chopped nuts (pecans, walnuts, etc.)
- 1/4 cup finely chopped fresh herbs (optional)
- 1/2 cup dried cranberries (optional)
- Additional nuts for rolling
- Crackers, veggies, or bread for serving
Tip: For a smoother texture, you can blend the cream cheese and cheddar cheese together using a food processor.
Step-by-Step Instructions
Step 1: Mix the Cheeses
In a large mixing bowl, combine the softened cream cheese and shredded cheddar cheese. Using a hand mixer or a sturdy spatula, blend until smooth and creamy. This step is crucial for ensuring that your cheese ball is easy to shape and has a delightful texture!
Step 2: Add Flavor Boosters
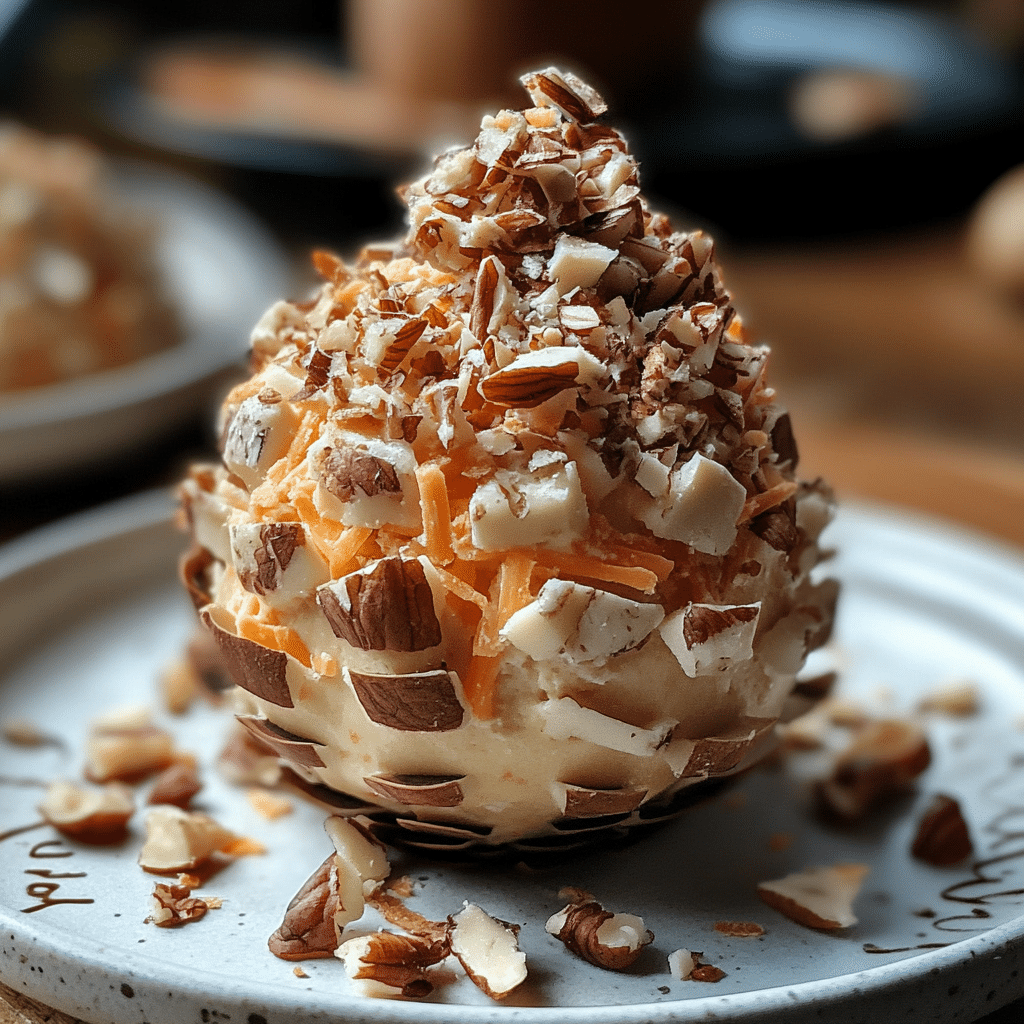
Fold in the chopped nuts and any optional ingredients like herbs or cranberries. This is where you can get creative! The combination of flavors will make your cheese ball extra special. Taste the mixture and adjust as needed — you want it to be delicious!
Step 3: Shape the Cheese Ball
Using your hands, shape the cheese mixture into a pine cone shape. Don’t stress too much about making it perfect; the nuts will help create a lovely texture that adds to the visual appeal. Wrap it in plastic wrap and refrigerate for at least 2 hours to firm up.
Step 4: Roll in Nuts
Once chilled, remove the cheese ball from the fridge and roll it in additional chopped nuts to create a “bark” effect. This step is what truly gives it the pine cone look, so have fun with it!
Step 5: Serve and Enjoy
Transfer your Pine Cone Cheese Ball to a serving platter and let it sit for about 30 minutes before serving. This allows the flavors to shine! Pair with an assortment of crackers, veggies, or toasted bread for the perfect bite.
Nutrition Info: Each serving contains approximately 150 calories, depending on the ingredients and serving size.
Final Thoughts
I hope you are as excited to make this Pine Cone Cheese Ball as I am! It’s a unique and fun way to elevate your gatherings and create lasting memories with friends and family. Trust me, once you try it, you’ll want to make it for every occasion. Happy cooking, and enjoy the delightful reactions from your guests when they see and taste this charming appetizer!
Related Recipes You’ll Love :


