
Let me tell you about the time I decided to whip up a batch of homemade chocolate truffles, and oh boy, was it a game-changer! These little bites of heaven have become a staple in my kitchen, and I’ve made them more times than I can count. Whether it’s for a last-minute dessert or a thoughtful gift, these chocolate truffles never fail to impress. Trust me, once you’ve tried making them, you’ll understand why they are so popular!
Why You’ll Love This Chocolate Truffles Recipe
- Quick and Easy: With just a few simple ingredients, you can whip up these truffles in no time!
- Versatile: Customize your truffles with various flavors and toppings to suit any occasion.
- Melt-in-Your-Mouth Goodness: The rich, creamy texture is simply irresistible!
- Make-Ahead Convenience: Prepare them in advance and store for later enjoyment.
- Impressive Presentation: They look luxurious, making them perfect for gifting or impressing guests.
The Secret to Perfect Chocolate Truffles
The secret to creating the most exquisite chocolate truffles lies in using high-quality chocolate. I always opt for a chocolate with at least 60% cocoa content; it truly elevates the flavor. Combining chocolate with cream creates a rich ganache that melts beautifully in your mouth. Trust me, the balance of chocolate and cream is crucial, and once you nail this, you can create truffles that rival any gourmet shop!
One insider tip? Don’t rush the chilling process. Letting the ganache cool properly ensures a smoother texture when rolling. You’ll be amazed at how a little patience transforms your truffles into a luxurious treat!
Rave Reviews from Friends and Followers
“These chocolate truffles were a hit at my dinner party! Everyone was asking for the recipe!” — Sarah T.
“I’ve never made truffles before, but this recipe was so straightforward. They taste incredible!” — Mark L.
“I can’t believe how easy these were to make! They were gone in minutes!” — Jen P.
Creative Variations to Try
- Mint Chocolate Truffles: Add a few drops of peppermint extract for a refreshing twist.
- Espresso Chocolate Truffles: Incorporate instant espresso powder for a caffeine kick.
- Orange Zest Chocolate Truffles: Mix in fresh orange zest for a fruity flavor.
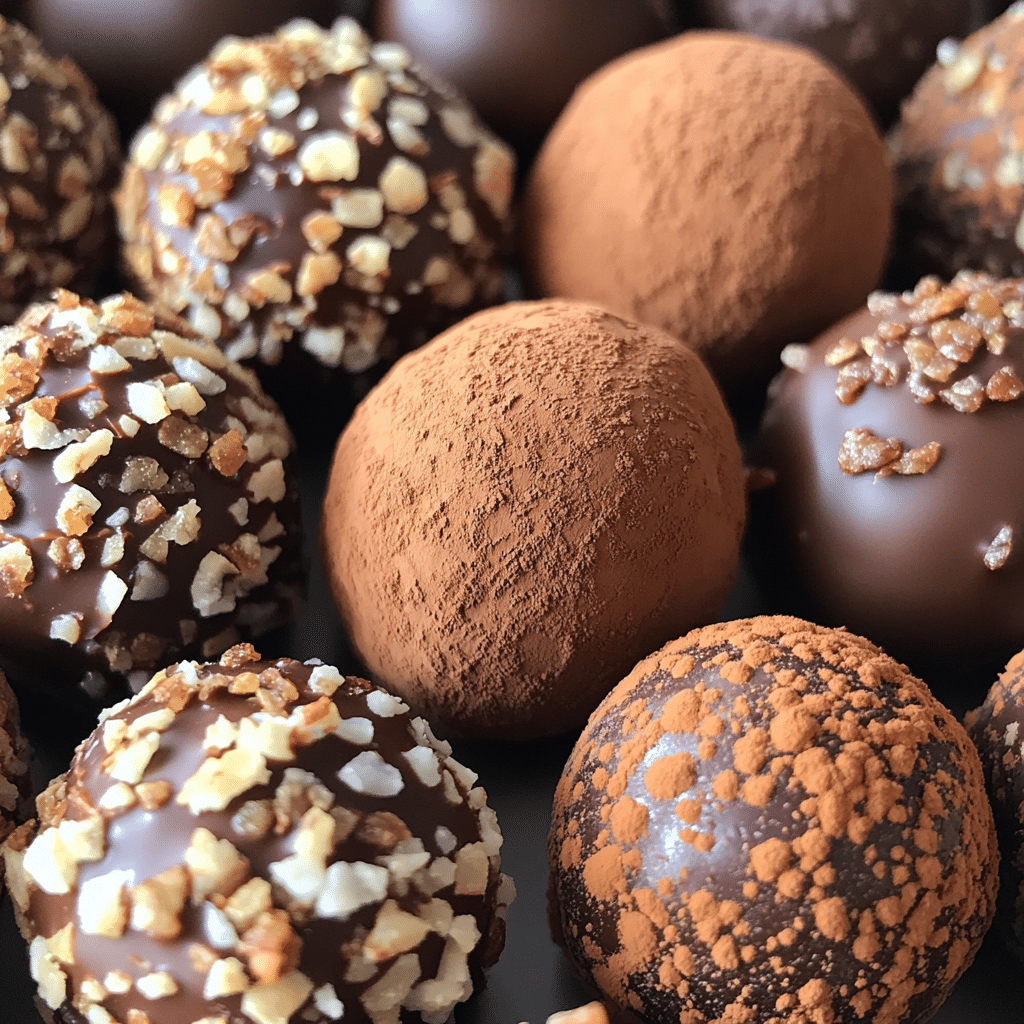
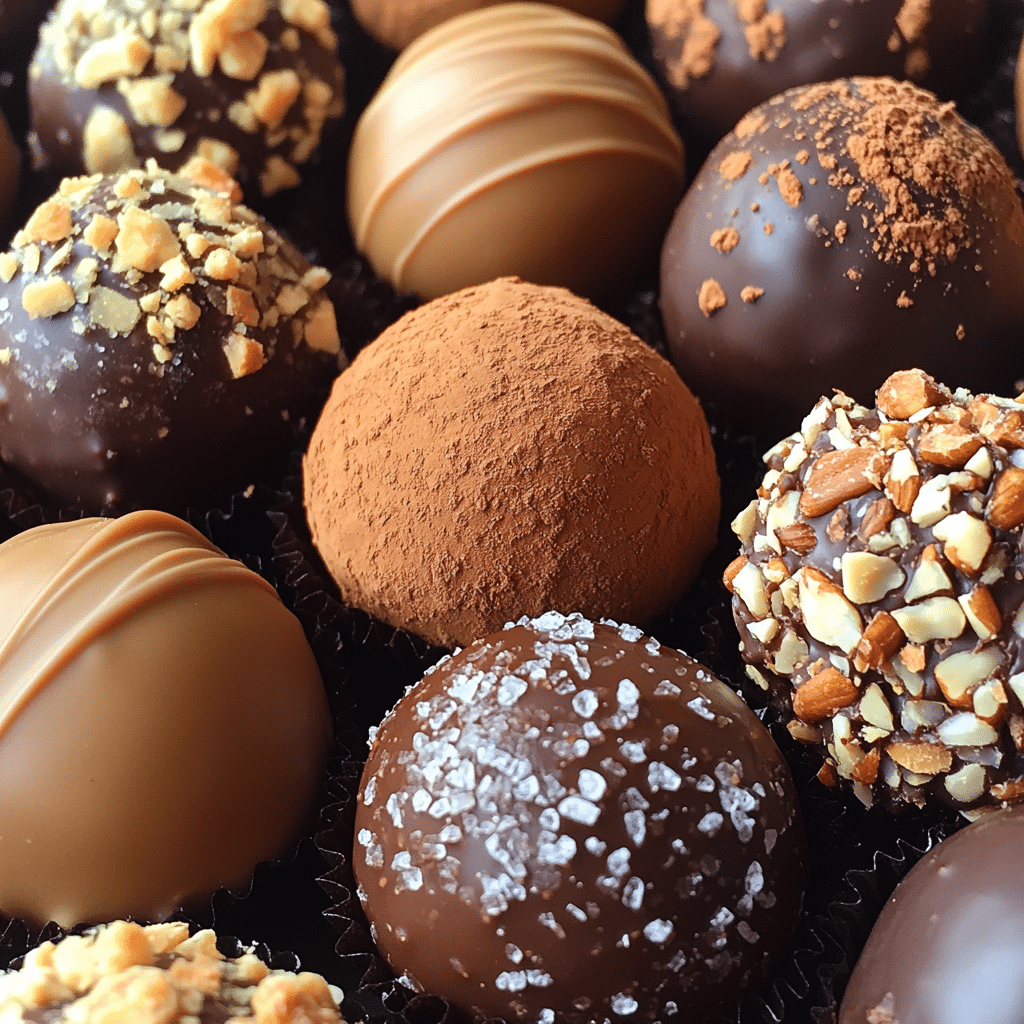
- Nutty Chocolate Truffles: Roll your truffles in crushed nuts for added crunch.
- Spiced Chocolate Truffles: Add a pinch of cinnamon or chili powder for a warm, spicy kick.
Bonus: Feel free to experiment with different coatings like cocoa powder, coconut flakes, or even crushed cookies to make them uniquely yours!
FAQs – All Your Questions Answered!
Can I use chocolate chips instead of baking chocolate?
Yes, but for the best flavor and texture, I recommend using high-quality baking chocolate.
How should I store my chocolate truffles?
Store them in an airtight container in the fridge for up to two weeks. Bring to room temperature before serving for the best taste.
Can I freeze chocolate truffles?
Absolutely! Just make sure to place them in a freezer-safe container. They can be frozen for up to three months.
What if my ganache is too soft?
If it’s too soft, simply refrigerate it for a bit longer until it firms up enough to roll.
How long do I need to chill the ganache?
Chill the ganache for at least 1 hour, or until it’s firm enough to handle.
Storage/Serving Tips
- Store chocolate truffles in an airtight container to keep them fresh.
- They can last up to two weeks in the refrigerator.
- For serving, allow them to sit at room temperature for about 15-20 minutes to enhance their flavor.
- Consider serving them on a beautiful platter for a touch of elegance.
Perfect Occasions for Chocolate Truffles
- Holidays like Christmas or Valentine’s Day, where sweet treats are a must.
- Birthday celebrations — everyone loves a homemade treat!
- Anniversaries for a romantic touch.
- Potlucks or gatherings — they are easy to share!
- As a thoughtful gift for friends or family, beautifully wrapped.
The Complete Recipe
Thanks for sticking around! Now, let’s get into the nitty-gritty of making these glorious chocolate truffles!
Chocolate Truffles
Ingredients
- 8 oz high-quality bittersweet or semisweet chocolate, chopped
- 1/2 cup heavy cream
- 1 teaspoon vanilla extract
- Cocoa powder, crushed nuts, or coconut for rolling
Tip: For additional flavor, consider adding a pinch of sea salt or flavored extracts such as almond or orange zest.
Step-by-Step Instructions
Step 1: Prepare the Chocolate
Begin by placing the chopped chocolate in a heatproof bowl. The quality of your chocolate really matters here, so choose something rich and delicious. You want every bite to be a little piece of heaven!
Step 2: Heat the Cream
In a small saucepan, heat the heavy cream over medium heat until it just begins to simmer. Don’t let it boil! The goal is to melt the chocolate, and boiling can lead to separation.
Step 3: Combine
Once the cream is ready, pour it over the chopped chocolate. Let it sit for about 2-3 minutes. This is where the magic happens! The heat will gently melt the chocolate, making it smooth and luscious.
Step 4: Stir Until Smooth
Using a spatula, stir the mixture until it’s completely combined and glossy. This is the ganache that will become your truffle filling. If it’s not melting completely, you can place the bowl over a pot of simmering water (double boiler method) until smooth.
Step 5: Add Flavorings
Stir in the vanilla extract, or any other flavoring you’re using. This is your chance to get creative! Mix it in well to ensure the flavor is evenly distributed.
Step 6: Chill the Ganache
Cover the bowl with plastic wrap and refrigerate for at least one hour, or until the ganache is firm enough to handle. Patience is key here!
Step 7: Form the Truffles
Using a melon baller or a teaspoon, scoop out some ganache and roll it between your hands to form small balls. This is where the fun really begins! Don’t worry about making them perfectly round; a little rustic charm adds character.
Step 8: Roll in Coating
Once rolled, coat them in your choice of cocoa powder, crushed nuts, or shredded coconut. This step adds texture and visual appeal, so have fun with it!
Step 9: Chill Again
Place the coated truffles on a parchment-lined baking sheet and chill in the fridge for another 30 minutes to set.
Step 10: Enjoy!
And there you have it! Your homemade chocolate truffles are ready to be enjoyed. They’re perfect for sharing or keeping all to yourself (no judgment here!).
Nutritional Information: Each truffle contains approximately 70 calories, with a balanced mix of fats, carbohydrates, and a touch of protein.
Extra guidance: If you want to impress your guests, consider garnishing with a sprinkle of sea salt or a drizzle of melted chocolate. Presentation
Related Recipes You’ll Love :


